Progress Check
Wow. We've gone ahead and taken the default UI5 application, made major tweaks, consumed an OData Service (that we built!), and have added the ability to send a link directly to a Sales Order to another user (our Router handles this).
Now that you've seen the basics of creating a UI5 client to consume an OData service, all that's left is more controls, performance improvements, and learning more about the internals of the framework.
Adding More Details into the Details
Like it was promised in the first screen capture, let's add a whole lot more data to the screen.
- Open
Detail.view.xml Replace the
<ObjectHeader>asset with:<ObjectHeader title="{BuyerName}" number="{NetAmount}" numberUnit="{CurrencyCode}"> <attributes> <ObjectAttribute text="{Note}" /> </attributes> </ObjectHeader>Run the application again
You'll see more data now. No, we didn't have to do any additional work in the Detail controller, because our view object already had binding syntax to
/SalesOrders('x'), so it knew how to grab these extra properties of our SalesOrder entity.If you are wondering how to know which fields were available, everything you need to know is in your OData service's $metadata endpoint. Go check that out to see what other data you can pull into the view. I challenge you to add at least one additional element to the screen.
Let's add some Line Items
Immediately following the close of your
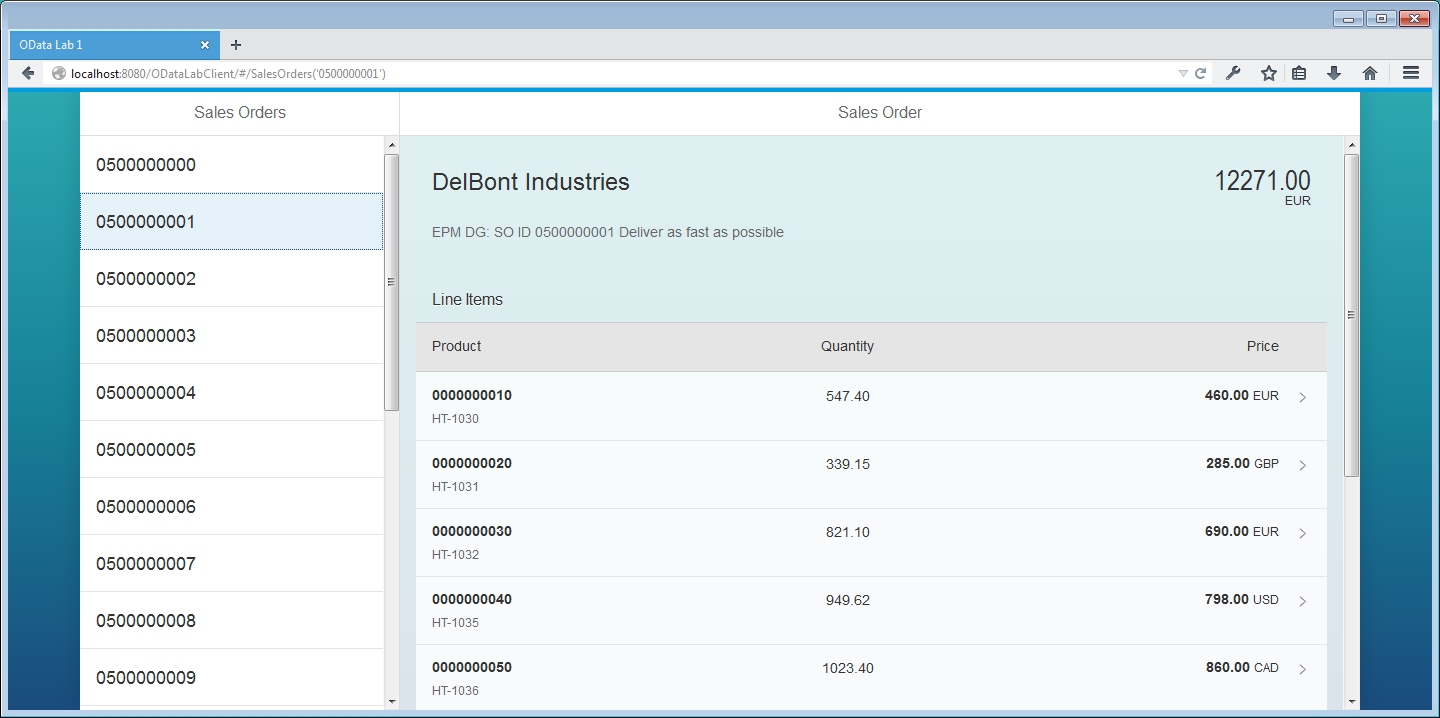
</ObjectHeader>line, let's add asap.m.Tableobject to display the line items associated with our sales order.<Table id="lineItemList" items="{path: 'LineItems'}"> <headerToolbar> <Toolbar> <Label text="Line Items" /> <ToolbarSpacer /> </Toolbar> </headerToolbar> <columns> <Column> <header><Label text="Product" /></header> </Column> <Column width="4em" minScreenWidth="Tablet" demandPopin="true" hAlign="Center"> <header><Label text="Quantity" /></header> </Column> <Column hAlign="Right"> <header><Label text="Price" /></header> </Column> </columns> <ColumnListItem type="Inactive"> <cells> <ObjectIdentifier title="{SoItemPos}" text="{ProductId}" /> <Text text="{GrossAmount}" /> <ObjectNumber number="{NetAmount}" unit="{CurrencyCode}" /> </cells> </ColumnListItem> </Table>We have a new Table object. It's items property is set to
{path: 'LineItems'}which will take the view's current binding syntax (let's say/SalesOrders('0500000003')) and bind this control's items to a sub-path (ie,/SalesOrders('0500000003')/LineItems).Everything else here should be just as self-explanatory as we have already covered.
Run the application again.
Now we have hit our end-state!
There is so much more to learn about SAPUI5, NetWeaver Gateway OData Services, and ASP.NET Web API OData. This has been an introductory lab — I sincerely hope you learned new things and are looking forward to more in the future.
