Setting Up Your Project
Let's now build a very simple SAPUI5 client which will try to parse an OData endpoint and display a list of objects based on the response it receives querying the entity set.
Our Goal
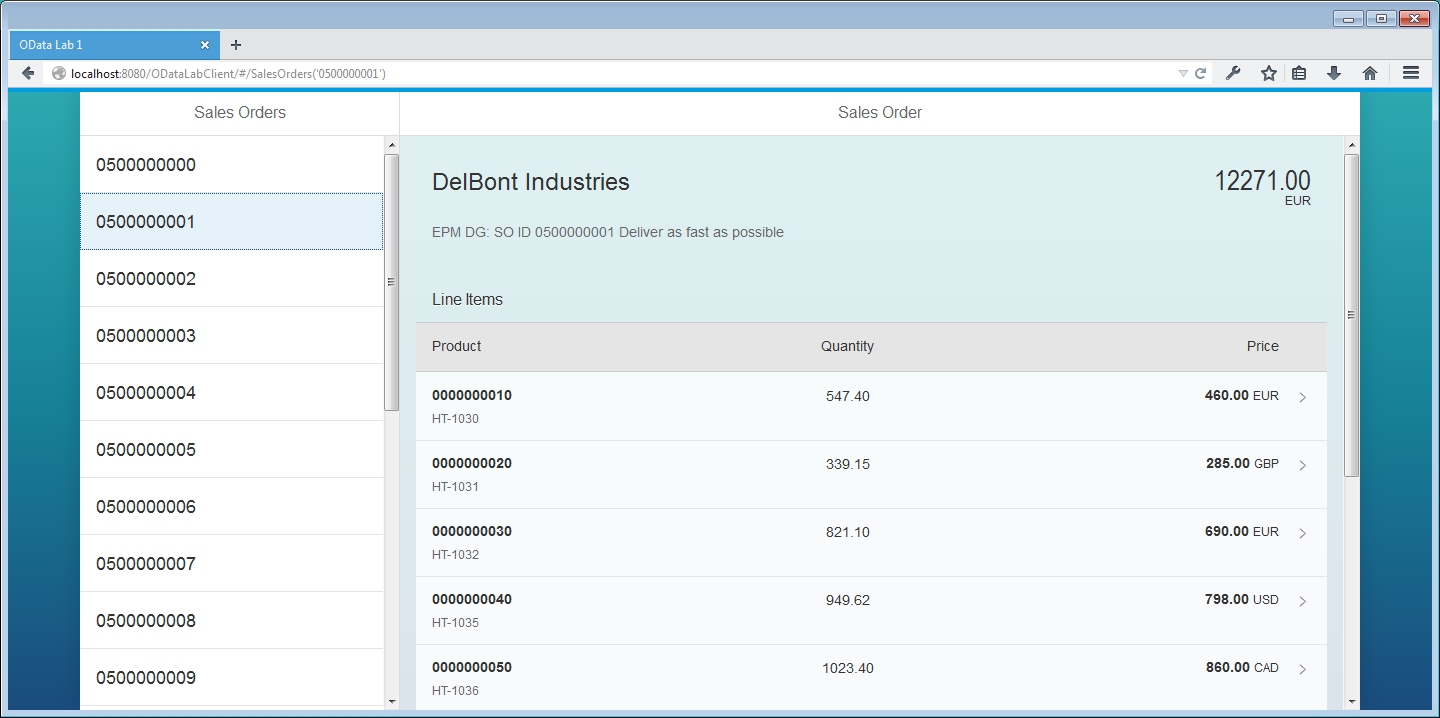
Our goal will display Sales Orders in a Master-Detail view. A typical Master-Detail view has a list of items on one side, and upon selecting an item in the list, the Detail view will load additional data about the selected item.
This is a screenshot of what our final product should look like.
Creating the UI5 Project
- Open Eclipse
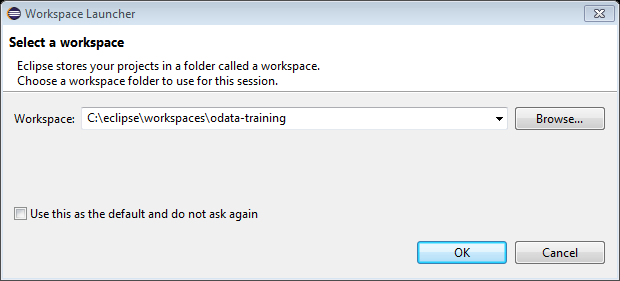
- If prompted, create a new workspace at
[your preferred directory]\workspaces\odata-lab
- If presented with welcome screen, click the Workbench icon in the top right of this view.
- Create a new project by choosing the New Project icon, and choosing 'Project…'
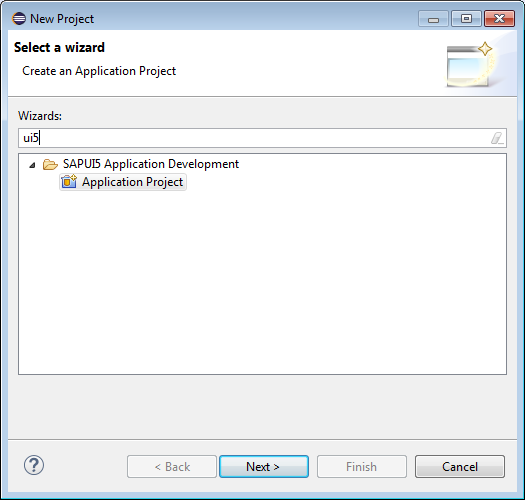
- Search in filter for 'ui5', choose 'Application Project' and click Next
- Set application name as : 'ODataLabClient'
- Set library as 'sap.m' and leave 'Create an Initial View' checked.
- When creating the initial view, set Name to 'App' and choose XML development paradigm. Click Finish.
- If you are prompted to open the Java EE perspective, you can switch to it if you'd like.
Set namespacing
For this demo, we will operate under the namespace base of odatalabclient. In this way, our views should live under odatalabclient.view namespace. Let's configure that now.
- Right click the folder named
odatalabclientwhich is under theWebContentfolder. Choose Rename… , change it to
view. Our controllers (JS) and views (XML) will be stored in here.Now that we've changed resource paths, we need to make UI5 aware of the changes we made.
Open
index.htmlModify the
<script>tag which loads the SAPUI5 core library. Change it to:<script src="resources/sap-ui-core.js" id="sap-ui-bootstrap" data-sap-ui-libs="sap.m" data-sap-ui-theme="sap_bluecrystal" data-sap-ui-xx-bindingSyntax="complex" data-sap-ui-resourceRoots='{ "odatalabclient": "./" }'> </script>This script snippet is what's generally referred to as the SAPUI5 bootstrapper. Not only does it pull in the
/sap-ui-core.js, it will pull in the required JavaScript files needed in thedata-sap-ui-libsattribute.What we've done is told UI5 core that when it sees namespace
"odatalabclient"to look in our root folder (./). This is relative to ourindex.htmlfile, so./translates to ourWebContentdirectory. Therefore, if we sayodatalabclient.view, it should look in./view.For now, let's also change the
sap.m.Appcomponent in the next<script>tag to use the proper path. Delete the call tosap.ui.localResources(instead of setting our resource root in the script, we set it in the script source above), and change ourviewNameto"odatalabclient.view.App".Make the following adjustments to the tag in
index.html. We will soon be removing this section, so don't worry about the contents too much right now.// sap.ui.localResources("odatalabclient"); // delete this line var app = new sap.m.App({initialPage:"idApp1"}); var page = sap.ui.view({id:"idApp1", viewName:"odatalabclient.view.App", type:sap.ui.core.mvc.ViewType.XML}); app.addPage(page); app.placeAt("content");Delete the
controllerNameproperty found inview/App.view.xml. We have no need for a controller here.Delete
App.controller.js.
Now, let's take a look at what it takes to run a UI5 application on Tomcat.


