Setting up the Detail View
Just like we set up our Master view, we'll do exactly the same with our Detail view. In our detail view, we hope to display:
- Sales Order Number
- Buyer Name
- NetAmount
Any time our master list changes, our detail list should update with new values as well.
Create a new View
- Right click on the
viewfolder - Choose New > Other …
Type view in the filter box. Choose view under SAPUI5 Application Development folder.
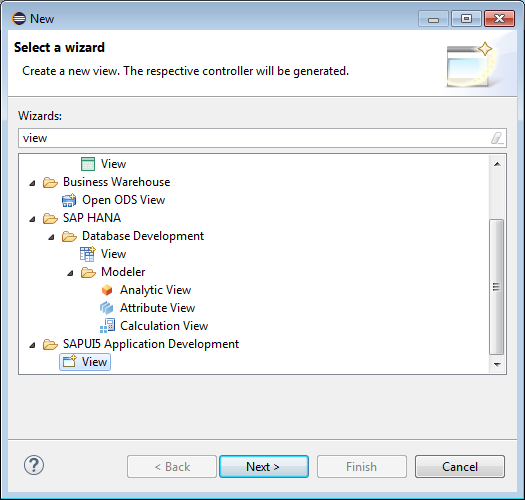
Enter
Detailas the view name and choose XML development paradigm.Update the
Detail.view.xmlfile with these contents:<mvc:View controllerName="odatalabclient.view.Detail" xmlns:mvc="sap.ui.core.mvc" xmlns:core="sap.ui.core" xmlns="sap.m"> <Page showNavButton="{device>/isPhone}" navButtonPress="onNavBack" class="sapUiFioriObjectPage" title="Sales Order"> <content> <ObjectHeader title="{BuyerName}"> </ObjectHeader> </content> </Page> </mvc:View>Let's take a look at what we've set up.
- A navigation button will show depending on if our device is a phone or not. We'll demo that.
- We have a
sap.m.Pageobject whose content is ansap.m.ObjectHeaderobject which is currently displaying theBuyerNamefield from our Master list's/SalesOrdersobjects.
Now let's get our Detail controller ready to start pushing data to the view and handling our events.
Update the
Detail.controller.jsfile with these contents:jQuery.sap.require("odatalabclient.util.Controller"); odatalabclient.util.Controller.extend("odatalabclient.view.Detail", { onInit : function() { this.getRouter().attachRouteMatched(this.onRouteMatched, this); }, onRouteMatched : function(oEvent) { var oParameters = oEvent.getParameters(); var sSalesOrderPath = "/" + oParameters.arguments.salesorder; this.bindView(sSalesOrderPath); }, bindView : function (sSalesOrderPath) { var oView = this.getView(); oView.bindElement(sSalesOrderPath); } });Run the application
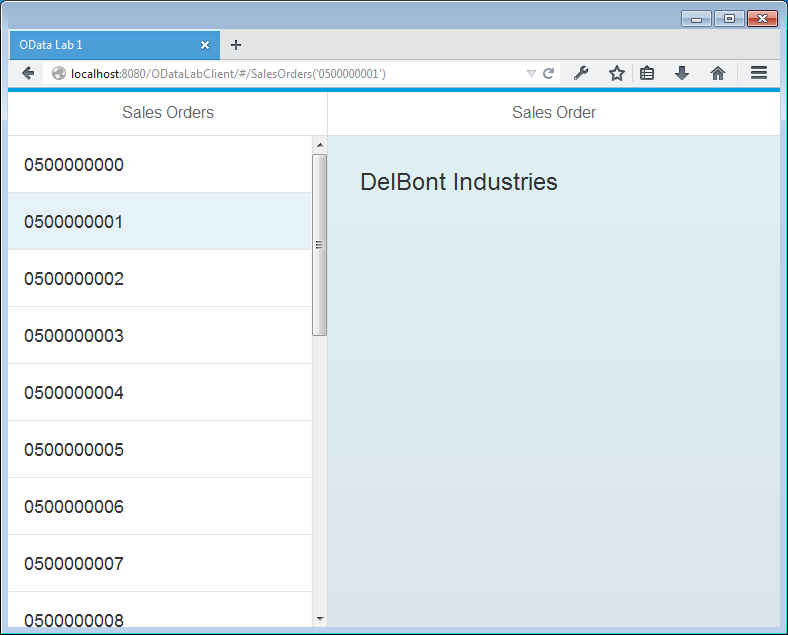
Choose an item in the list
You should now see the BuyerName associated with the sales order show up in the Detail view.
Previous section:
Using our Router
Next section:
Final Touches