Attaching to our Model
For this demo, I have already supplied a sample data source running on SQL Server 2008 R2. We will use a Todos entity as the resource of our service.
-- Connection information will be provided by the instructor.
For those interested in replicating their own database instance, please use this Gist which contains the necessary SQL to build a database and table for this lab.
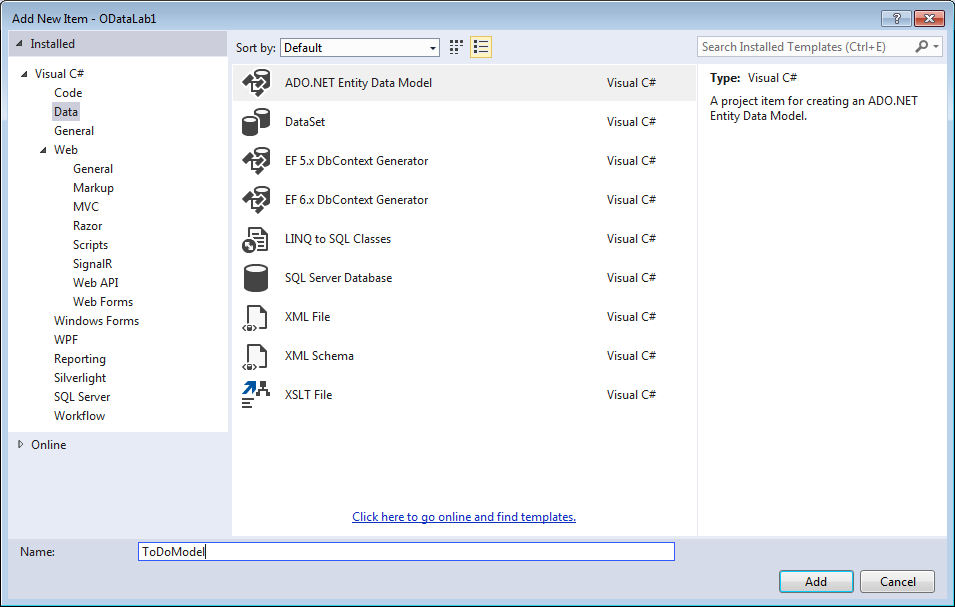
- Let's add a new data context. Right click on Models folder, and choose 'Add New Item…'. Choose 'Data' in the category tree, and select 'ADO.NET Entity Data Model'. Name your data model ToDoModel.
- Choose 'EF Designer from database' since our model already exists in SQL Server.
- Fill out a new connection property with instructor-provided (or your own) database information.
- Click 'OK', and choose 'Yes, include the sensitive data in the connection string.'
- Save connection settings as: 'ToDoEntities'
- If prompted, choose 'Entity Framework 6.x'
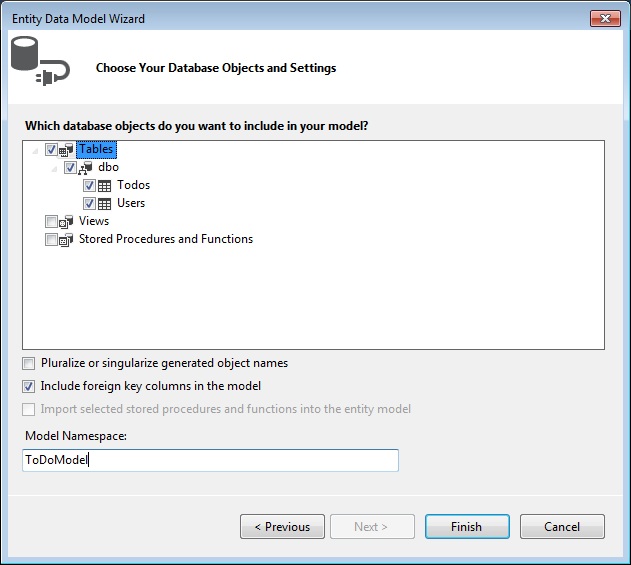
- Include all tables. Uncheck pluralize object names. This adds 'Todoes' as the plural of Todos. Gross. We will fix the Todos entity separately later.
- Set Model Namespace to be ToDoModel
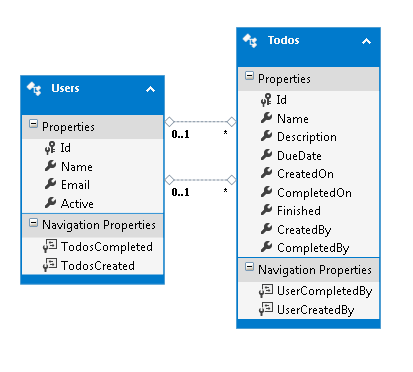
This will automatically add a reference via NuGet to the latest version of EntityFramework (which we chose in step 6). You will now see the EDMX diagram. You'll see some navigation properties. These are set up by the Foreign Key relationship defined by our model.
- Let's rename them from properties that don't make sense to something human readable. If you left-click on one, you can see the referenced properties in the other table. Now, name each one by right-clicking and choosing Rename to items that make sense. I chose
['TodosCompleted', 'TodosCreated']in the Users table, and['UserCompletedBy', 'UserCreatedBy']in theTodostable.
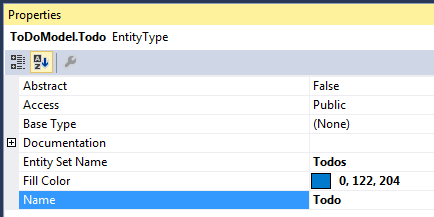
- Additionally, let's change the entity name to Todo and User respectively. This is an optional step, but helps make sense from the backend when dealing with these entities. Double click on the name at the top, and it will allow you to change the Entity name. This can also be done in the properties window by single clicking on the Entity name.
For the name change to take effect, you must build the project.
- Right click on ODataLab1 solution and Build.
If you expand the edmx completely in your Solution Explorer, you should now see both Todo.cs and User.cs under the text template ToDoModel.tt.
Now, we need to work on building an API controller so that we can surface this data from web endpoints.


