Implementing OData Controllers
Now that we have our entity and data context in our application, let's build an endpoint to expose them with Read/Write actions. First, let's install the Web API OData NuGet Package.
- Open Package Manager Console by going to Tools > NuGet Package Manager > Package Manager Console.
PM> Install-Package Microsoft.AspNet.WebApi.OData
This will install the OData v1-3 runtime provided by Microsoft for Web API 2.2.
- Now, let's right click on the Controllers folder and click Add > Controller…
- Choose Web API 2 OData Controller with actions, using Entity Framework
- Choose the
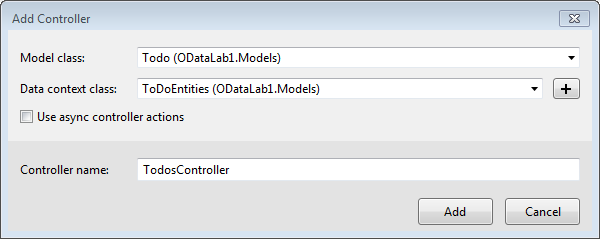
TodoModel, theToDoEntitiesData Context, and nameTodosControllerproperly.
Now, Visual Studio will do some scaffolding for you. When it finishes, you should have a TodosController now available.
Registering your OData Controller in Web API
Near the top of this controller, there are some instructions on registering this OData route in the WebApiConfig class. ODataController routes are not automatically configured like your traditional ApiController. You will instead see a message asking you to manually merge a MapODataServiceRoute call into your WebApiConfig. So let's do that now.
- Open App_Start\WebApiConfig.cs
- Replace file contents with:
using Microsoft.Data.Edm;
using ODataLab1.Models;
using System.Web.Http;
using System.Web.Http.OData.Builder;
using System.Web.Http.OData.Extensions;

namespace ODataLab1
{
    public static class WebApiConfig
    {
        public static void Register(HttpConfiguration config)
        {
            // Web API configuration and services

            // Web API routes
            config.MapHttpAttributeRoutes();

            // Web API configuration and services
            config.Routes.MapODataServiceRoute("odata", "odata", GetModel());
        }

        private static IEdmModel GetModel()
        {
            ODataConventionModelBuilder builder = new ODataConventionModelBuilder();
            builder.EntitySet<Todo>("Todos");
            builder.EntitySet<User>("Users");
            return builder.GetEdmModel();
        }
    }
}
This file now maps the Entities Todo and User to exposed entities via OData. There is still only one ODataController though, so /Todos is still the only root path available to us. Let's run the application!
